
50% of organizations admit that they’re making a notable effort to improve business processes.
But if these organizations don’t map their processes, they’ll struggle to make improvements.
Process mapping is crucial to understanding how your business processes are actually performed so that you can identify bottlenecks and waste in the pipeline.
Here’s everything you need to know about process mapping, along with why it’s important, and eight best practices to make sure your process mapping is up to snuff.
Looking to jump ahead? Click here.
- What Is Process Mapping?
- Why Is Process Mapping Vital?
- 8 Process Mapping Best Practices
- What Next After Process Mapping?
What Is Process Mapping?
A business process map or model is a visual representation of a work process.
Starting at the trigger point and ending at the termination point, a process map is a detailed flowchart that shows each step in the entire process in the order that it occurs.
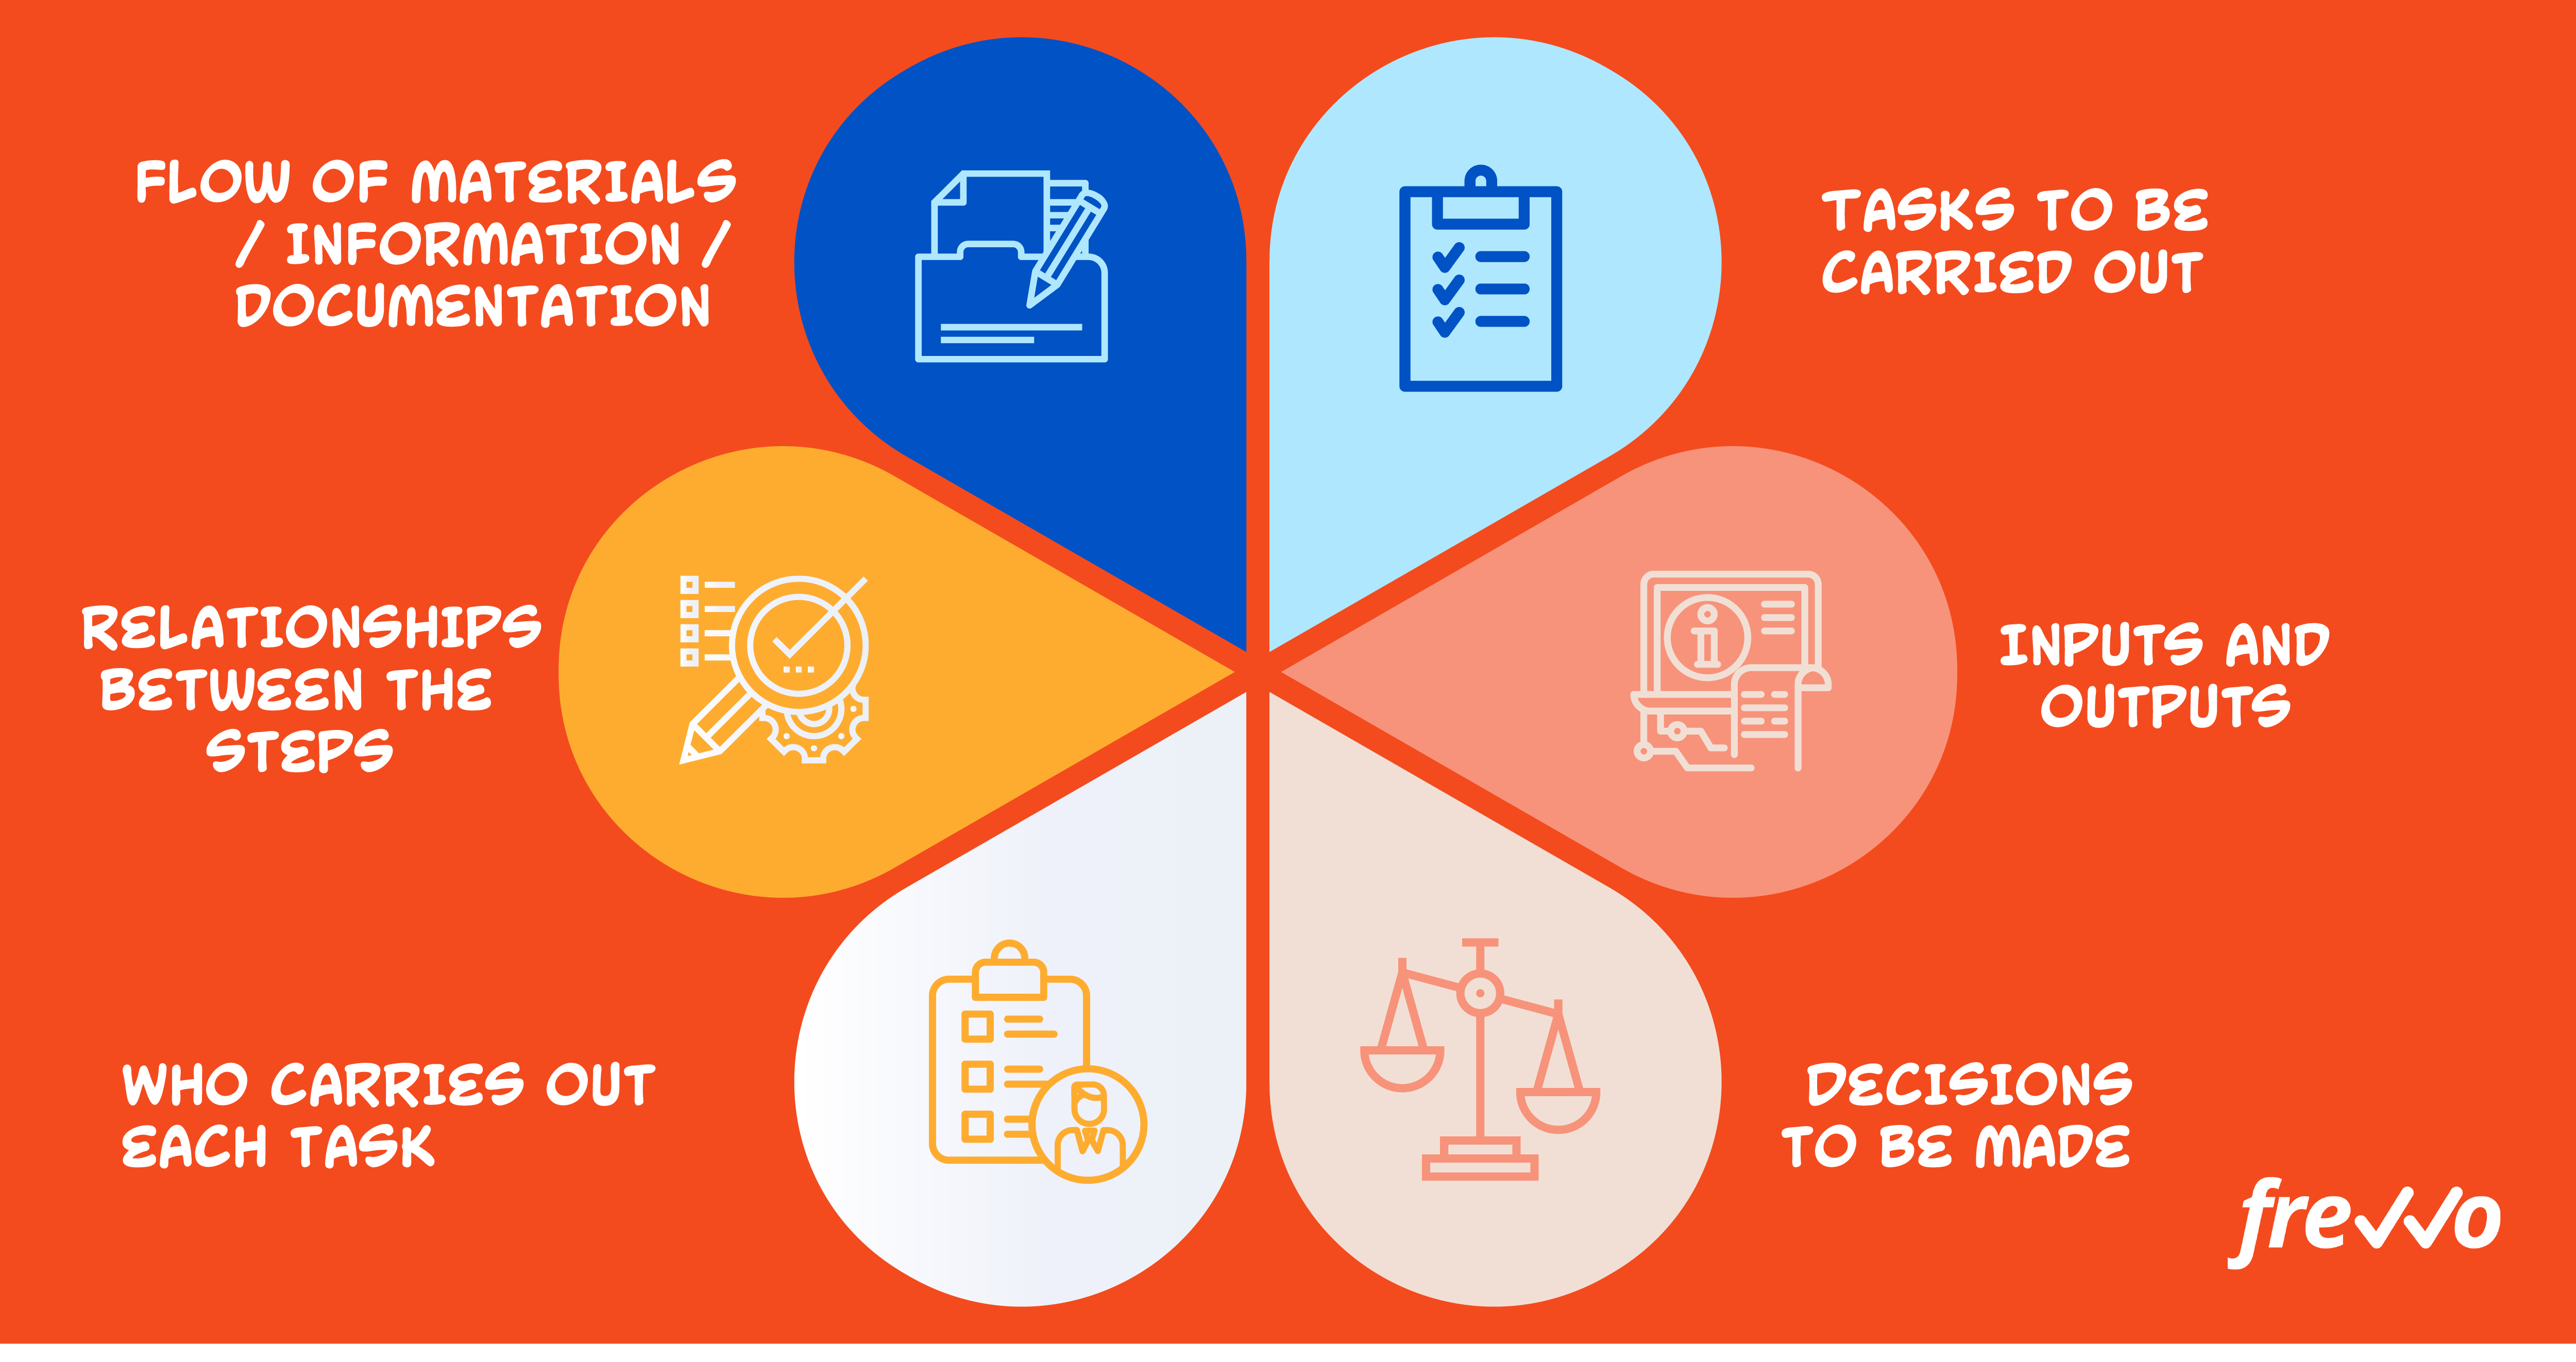
A high-level process map is usually just a basic flowchart that shows each process step and task in order.
However, a process model may also outline who is involved in the process management. This helps with accountability and tracing back decision-making.
A more detailed process map will also show the materials, information, and documentation as they flow through the process. This gives you an idea of the inputs and outputs at each stage.
The act of workflow process mapping is when you create a process flowchart of a particular business process.
This practice can be done by hand or by using process mapping software.
Business process modeling can be used for both new and existing processes. You may use business process mapping to drill down into your core processes for process improvement, or you could use it to model new workflows from scratch.
When mapping a current process, you’ll identify the steps, decisions, tasks, and conditions that are already occurring when your staff completes the process.
When mapping a new workflow, you determine the tasks and steps from scratch and design the whole process flow anew.
Why Is Process Mapping Vital?
Mapping is the key to creating efficient new processes and ensuring continuous improvement on existing processes.
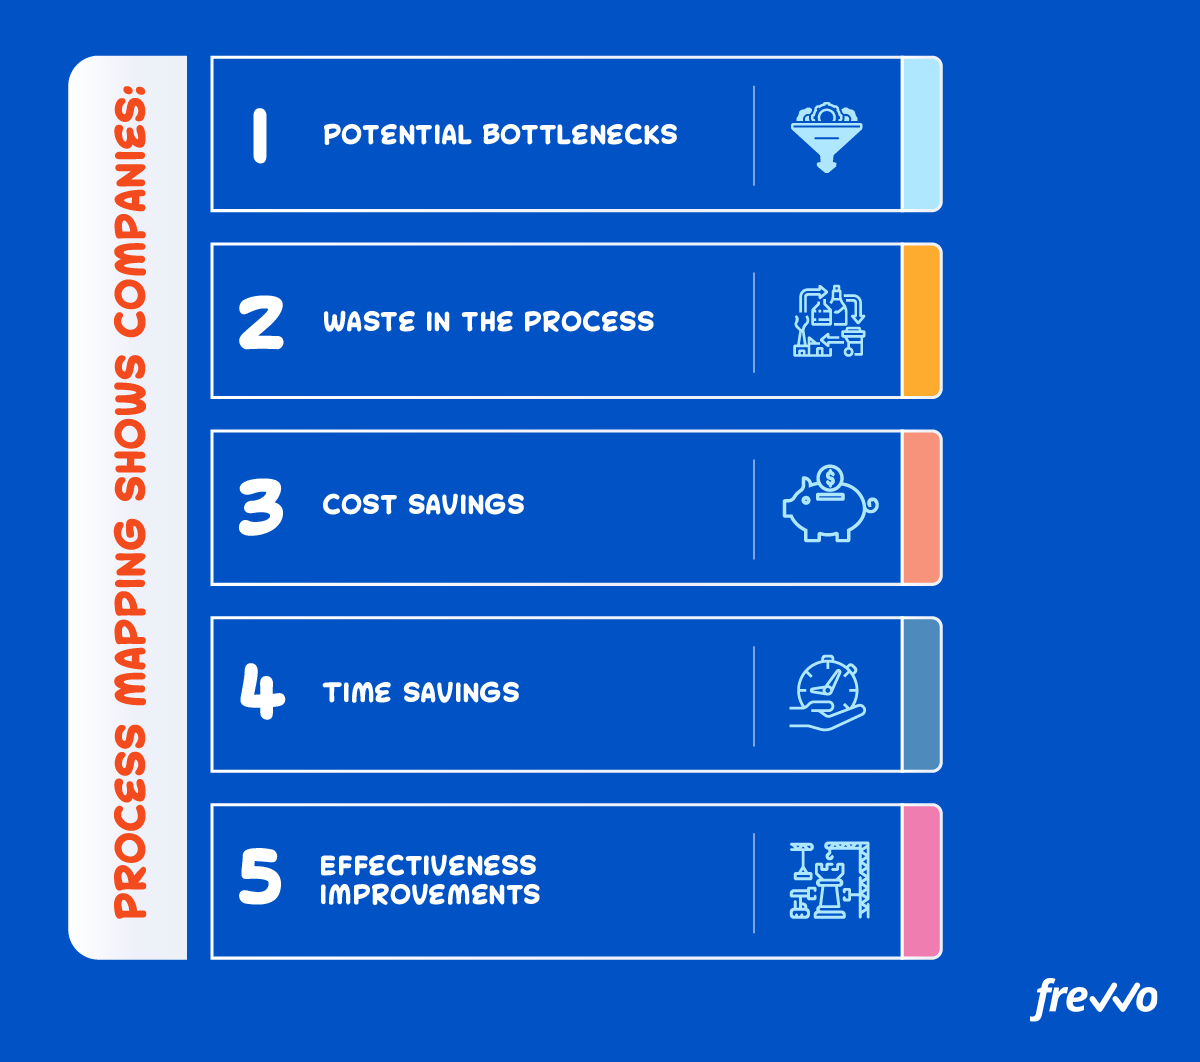
Working on the details of your workflow map helps you see where processes can be honed to avoid bottlenecks, reduce potential waste, and boost efficiency.
For example, 70% of the organizations say they’re working on their processes to cut down on costs and enhance productivity, while 35% say they put in the work to improve the end product. For 30% of firms, working on processes is their route to better customer satisfaction.
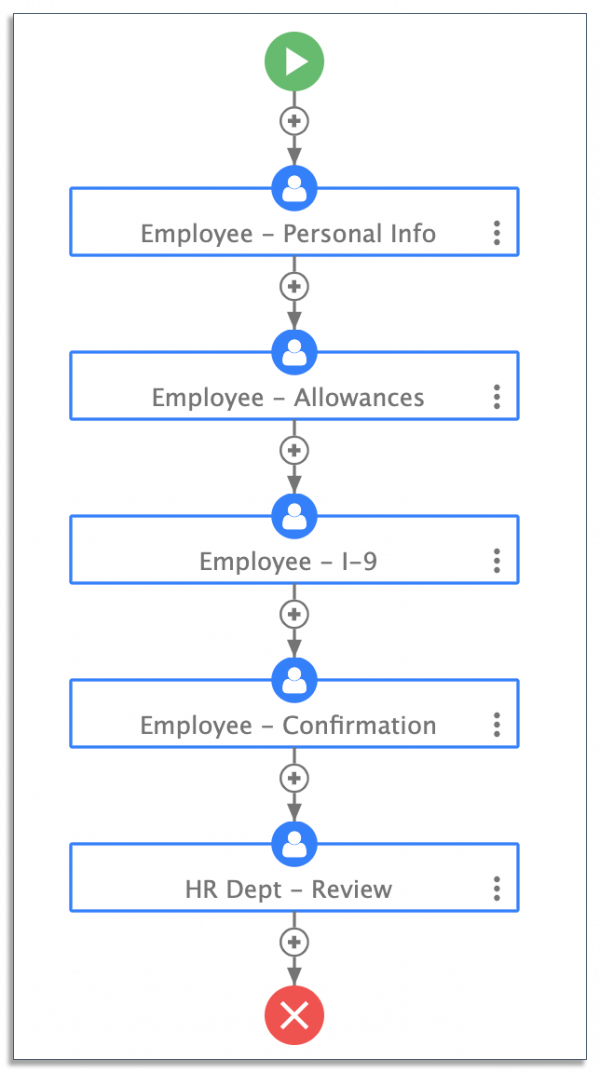
Take Cajon Valley School District, for example.
Previously, its onboarding process was slow and error-ridden. Completed manually, the onboarding workflow required lots of hard copies of documentation, tedious manual data entry, and slow processing by hand.
By creating a map of the process, Cajon Valley School District was able to see where the improvement opportunities were in the flow diagram.
Recognizing that manual processing was significantly hampering the onboarding workflow, the school district switched to frevvo to digitize and automate the onboarding process.
This cut out the bottlenecks, reduced the errors, and sped up the process.
8 Process Mapping Best Practices
Prefer to see and hear it rather than read about it?
Let us show you how easy it is.
Your process flowchart serves as a map to create a repeatable process performed the same way every time. This not only makes training easier it also increases productivity and consistency.
Here are some process modeling best practices to ensure your internal processes run smoothly.
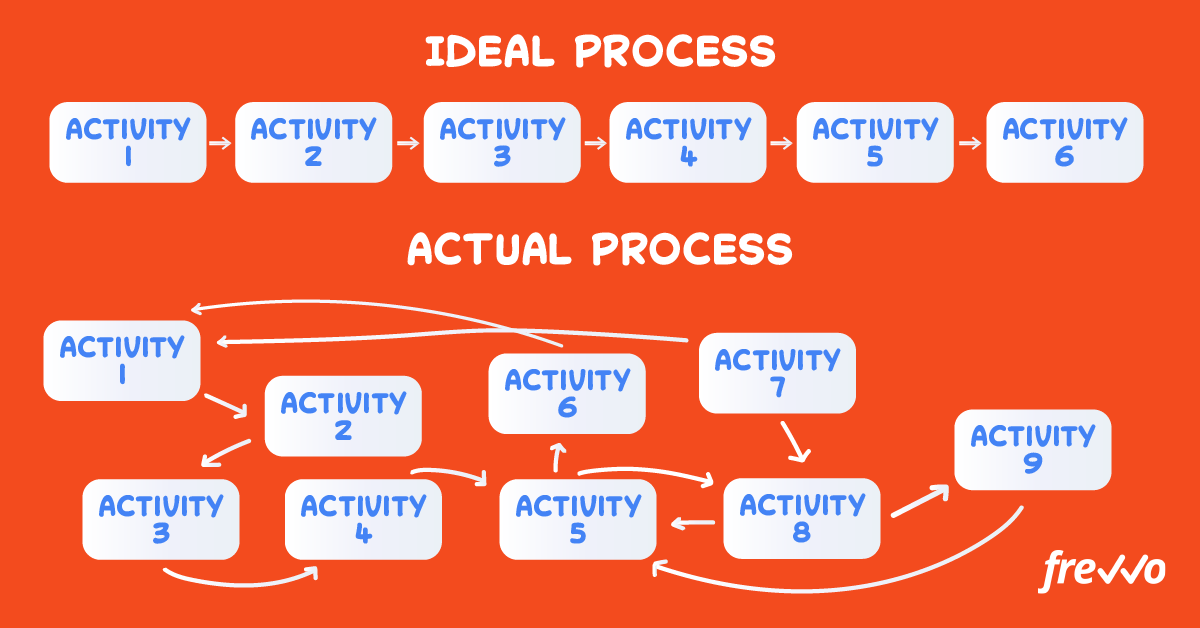
1. Map the actual process, not the ideal process
When creating a workflow diagram of a current process, it’s tempting to map out how the process should be instead of what’s actually happening. While you may have a process in place officially, you need to recognize when people aren’t following this to the letter.
Senior staff may train employees to carry out workflows a certain way, but that’s not always how things work out on the floor. If you’re serious about process improvement, you need to understand what’s taking place in real life.
If you don’t, you’ll fail to spot where bottlenecks are occurring. You won’t see what’s eating up time and money or where staff are being unproductive. You’ll simply have a clear-cut diagram that tells you nothing about reality.
2. Stick to the present
It can be tempting to discuss process improvement when you’re in the middle of creating a process map. Try to suppress the urge to do this.
When you’re in the process mapping stage, stick only to process modeling — otherwise, you’ll get confused.
The idea of your final diagram is to get a clear picture of what’s going on in reality, who is involved, and what resources are moving through the flowchart.
This is not the time to look for improvement opportunities. These will become clear once you have a detailed process map in front of you.
If you start implementing improvements without understanding how the entire process works, you may not solve your problems.
These improvements may not get to the root cause of the issue you’re having and are therefore valueless. Worse still, your uninformed improvements may make matters more complicated further down the line.
To avoid negative effects, make sure you get the whole picture first with a full workflow diagram.
3. Identify process scope and stretch outwards

To make sure you’re covering the entire process, you need to work out the process scope before you start mapping it out.
Identify the process triggers, where the workflow starts, where it ends, and what it covers. This is vital for true end-to-end workflow analysis.
However, it’s also smart to push the analysis out a little further. You should identify what happens just before the process starts and just after it ends.
That way, you’ll get a feel for any bottlenecks that delay the start of the workflow and any potential jams that may cause negative feedback at the end. You may find that your issues don’t lie within your current process but the steps just before or after it.
Equally, if you’re modeling a new process, you’ll want to be sure you’re not disrupting the work that comes before and after it.
4. Pinpoint your goals early
When creating process maps, ask yourself what the purpose behind the task is. What are you trying to achieve by mapping out this process?
There may be several reasons for creating a process map.
Some common goals include:
- Improving efficiency
- Speeding up the process
- Reducing process costs
- Cutting out errors in the workflow
- Enhancing the end product
- Increasing accountability
Knowing your goals will help you work out where to focus your efforts when making improvements to the process flowchart since not all goals work together in harmony.
For example, you may want to cut out errors and increase speed, but this may mean spending a little extra money. You may want to increase accountability and enhance the end product, but this may mean slowing down the process.
Having these goals in mind during the mapping process helps get you into the right mindset to see improvement opportunities that match your goals.
5. Keep process maps consistent
It’s wise to keep a consistent mapping technique throughout your entire organization so that everyone can understand the process documentation that accompanies the mapping procedure.
If you start using a different mapping technique, you may confuse staff, leading to unwanted outcomes.
If you’ve chosen a process mapping tool to work with, it’s easier to keep the mapping technique consistent. However, if you’re doing this by hand, agree on the symbols you’ll use for each process chart and ensure all departments follow the same rules.
6. Map your baseline path first
Complex processes can get overwhelming when you’re creating a detailed flowchart.
It’s best to start by creating your baseline path first before adding conditions that may occur from different decisions along the workflow.
Your baseline path is the most common route that gets taken through your process.
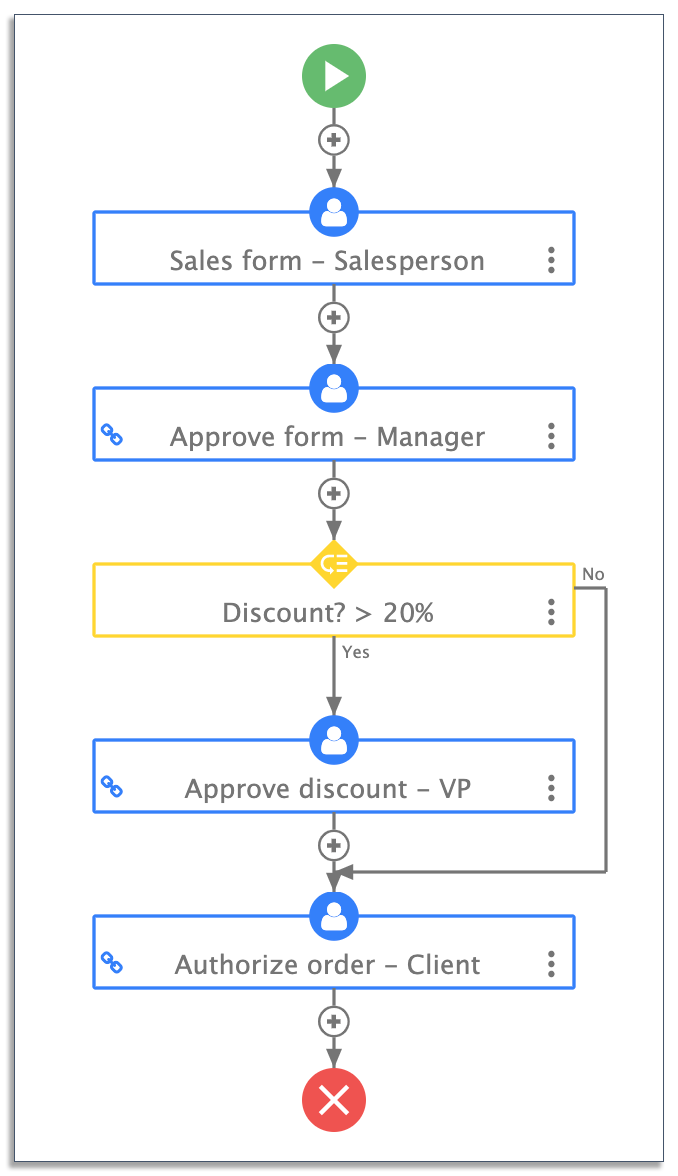
For example, say you’re mapping a sales order approval process. Usually, your sales orders are for amounts of around $500, but you may have to pass sales orders to a more senior manager if they’re over $1,500.
Your baseline path would be the usual process you follow for the smaller amounts, as this is the action that occurs most often. You’d map this first as a basic flowchart.
Your condition is for orders that exceed $1,500. You would map this second in your more detailed flowchart.
When you’re improving existing processes, this helps you to understand whether the basic workflow is a problem or if the bottlenecks are occurring within the conditional workflows.
While you’re there, it’s also wise to map out a break-fix scenario in your deployment flowchart. This is the process that would occur if something made it impossible for your regular process to take place.
7. Use your whole team
Not everybody will experience each process in the same way.
For instance, while your process management team may see completed workflows and consider them a success, the operators on the ground may find the processes a struggle to get through.
In general, those operating the processes are far more likely to see the intricacies of bottlenecks daily. They, therefore, have valuable insights into how the processes function and what needs to be improved.
If collaboration is poor, the effectiveness of process mapping is limited and can lead to duplicate efforts for improvement. In this sense, you need to involve everyone when creating process maps.

In particular, make sure you reach out to all the departments involved. For example, when filing paperwork, the finance department may notice consistent errors in invoices that the procurement department has approved. Cross-departmental cooperation will help bring these issues to light.
Likewise, external stakeholders, such as suppliers and vendors, may also have different insights into how the process is functioning.
Make sure you involve each stakeholder in the mapping process.
Ask them how they see the process functioning, focusing on what steps occur, how long they take, and what resources are needed. You may find that tasks take longer than expected or need more inputs than previously realized.
Having these other perspectives will help with process improvement.
8. Pick the right process mapping software
Your process mapping tool should be easy to use, as it’s designed to make the modeling process simpler for your team.
Your staff already has a lot of work to do. They don’t want to have to learn a new and complicated process mapping software on top of everything else. Plus, if it’s too tough to get the hang of, staff simply won’t use it.
Look for a process mapping tool that gives a clear visual representation of your processes in a way that your staff can understand intuitively.
For example, a swimlane diagram tool like Lucidchart uses simple-to-understand symbols that show what should be done by who, at which stage of the process.
If you’re unsure how to create process maps from scratch, try to find a process mapping software with a process map template library to help you and your team get started.
What Next After Process Mapping?
Process mapping is just the first step to building robust business processes.
Once you’ve got an idea of how an existing process works or you’ve designed a new process from scratch, you need to think about how you’re going to optimize it in practice.
Whether you’re looking to make a continuous improvement to a current process or streamline a brand new one, it’s smart to digitize and automate as much of that process as you can.
That’s where business process automation software like frevvo comes in.
With frevvo, you can build your processes from scratch or choose from the library of pre-built process templates, such as:
- Onboarding
- Sales orders
- Purchase orders
- Expense reimbursement
- Vacation requests
- Invoice approvals
- Consent forms
Each template is fully editable, enabling you to create and alter the dynamic workflow to fit the process map that you’ve created. Add steps, assign roles, and create conditions that suit your workflow.
Next, create and customize digital forms using the drag-and-drop editor and assign business rules to your forms, so they move through the steps automatically.
Succeed with process mapping
Process mapping is an absolute necessity if you want efficient and effective processes. Whether you’re improving current workflows or designing processes from scratch, process mapping will help you to get a clear picture of what’s going on.
Remember, it’s important to invite all team members to participate in the workflow mapping process. If you don’t include various viewpoints, you’ll likely miss some of the important ways in which your process could be improved.
It’s also crucial to choose the correct tool. If you’re looking for a simple way to automate your processes once you’ve created a solid process map, try frevvo’s free trial today.
